Support / Getting started / Phone and computer / Windows
The following instructions are for Windows 10. If you're running an older version you can still follow the same steps, except some of the screens you see may look a little different. If you've "upgraded" to Windows 11, may God help you. You can probably follow the same steps but who knows? You're on your own.
Note: blockerDNS needs to know who you are when you make a DNS request so that the right blocking settings are applied. For DoT and DoH you don't need to do anything because you have a unique URL that includes your username. But for standard DNS, you need to associate your public IP address with your blockerDNS account. Read about that here.
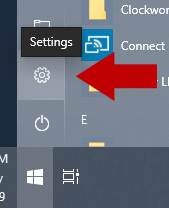
Go to the Start menu and then Settings
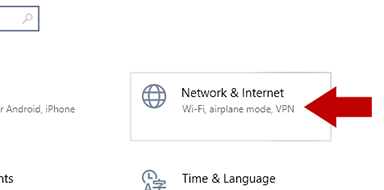
Go to Network & Internet
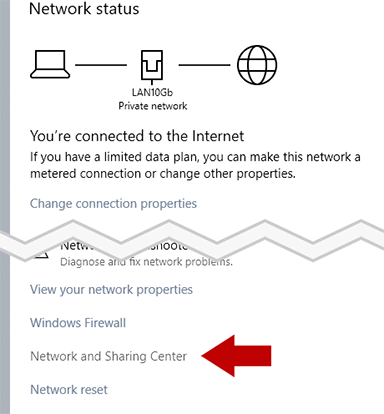
Go to Network and Sharing Center
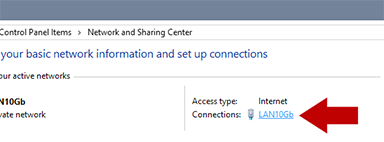
Click on your Internet connection
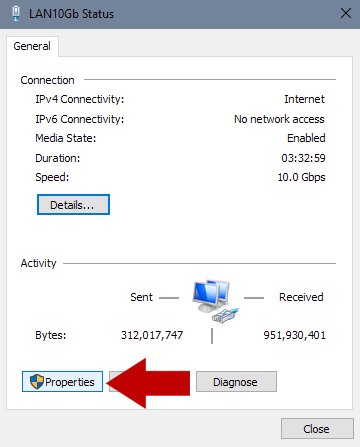
Go to Properties
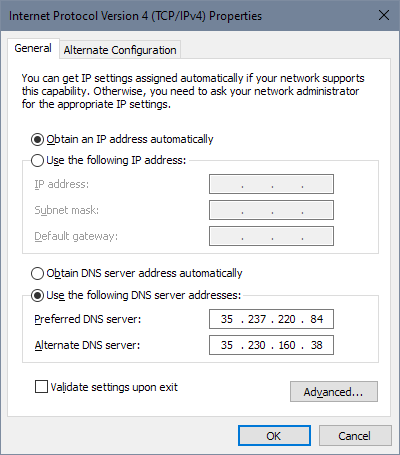
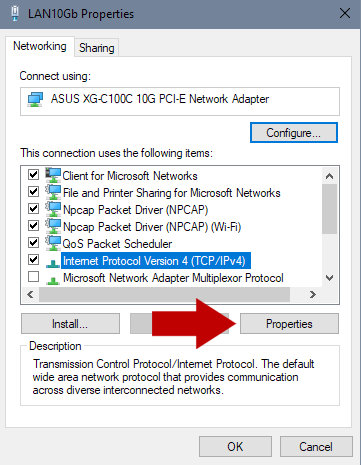
Highlight Internet Protocol Version 4, and then click Properties
Click Use the following DNS server addresses
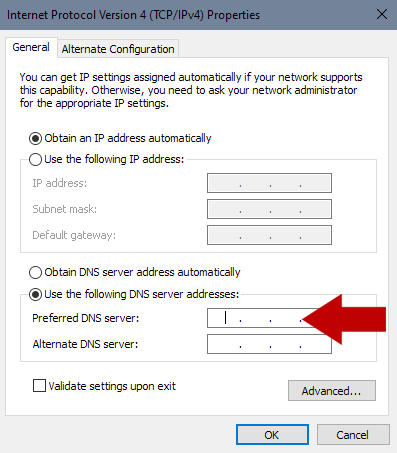
Enter the IP addresses shown and click OK
